Step by Step: Movie

Day 11 was Movie, which gave me a perfect opportunity to draw my favourite characters: Harry, Ron and Hermione!

1. Basic composition in blue values. As a brush I used a basic, rough textured one for a painterly feel to it.

gt1

2. Defined facial characteristics.

gt2

3. Added a layer, set layer option to soft layer (overlay works as well) and defined my colour palette.

gt3

4. Up the vibrance, add a texture, use color dodge and keep drawing!

gt4

5. Last changes to background and never, ever forget to add a watermark.

11. Movie

For more detailed and extensive tutorial content, click here and here

Hope you liked it guys! You can let me know in the comment section below.

Love, Eve


Step by Step: Clown

Evening cuties!

Here is a quick two step process of Day 9 of October: Clown! It explains what I do when a piece is nearly finished.

1. Below you can see the nearly finished painting. But it still needed some more contrast and vibrance to make it ‘pop’ more.clown1

2. So I added two textures, set them to Lighten and erased some bits here and there. I also altered the contrasts, made her lollipop bigger and more blurred and added some details!

8. Clown

If you have any questions, comment in the section below.

There are more tutorials here: Texture tutorial – Customise Brushes – Self portrait tutorial

Love, Eve

Step by Step: Vampire

Day 7 was Vampire! I think I went a little overboard on this one…

If you wish to view more detailed tutorials of my working process, click here: Colour tutorial – Texture tutorial

1. Basic tumbnail and experimenting with colours.

vamp1

2. Adjustment of placement, colours and facial feautures

vamp2

3. Adding a background and effects

vamp3

4. Details, details details! As a final step I added some blood on her clothes (she is a vampire after all).

7. Vampire

Let me know what you think!

Love, Eve

Step by step: Decay

Day 5 of October is Decay!

Below I show you a couple of steps on how to make an artwork more vibrant and dynamic. If you wish to view more detailed tutorials, click here: Original & Composition – Texture tutorial

1. First I searched for some inspiration, so I just put ‘decay’ in the Pinterest search bar and stumbled upon this gorgous stone picture with such vivid colours.

decays

2. Started out with a basic drawing.

decay1

3. Her sigarette was going to be a focal point of warm light, so I already layed down those highlights.

decay2

4. I then added all the smoke around her and made good use of the color dodge tool to highlight some areas more!

5. Decay

And that is it! Let me know what you think.

Love, Eve.

Step by step: Gaze

Day three of October is Gaze! Here is my quick step by step of the painting. I will not discuss any details this time, if you wish to view more elaborate tutorials, click here: Study Tutorial – Reference tutorial – Self portrait tutorial .

I took reference from the famous painting of Johannes Vermeer, Girl with Pearl.

1. Started with a base that locked in the colours and shapes

Gaze

2. Continued adding details and settled on a background

gaze2

3. Started on modernising her clothing and adding her hair, as well as adding contrast between background and foreground.

gaze3

4. Added details (look at the pearl) and finished up the background! That is it!

3. Gaze

There will be more step by steps this month, so be sure to check back in again.

Love, Eve

Self portrait tutorial

Hi cuties! It is tutorial time 🙂

This time I made a step-by-step tutorial of my latest selfportrait.

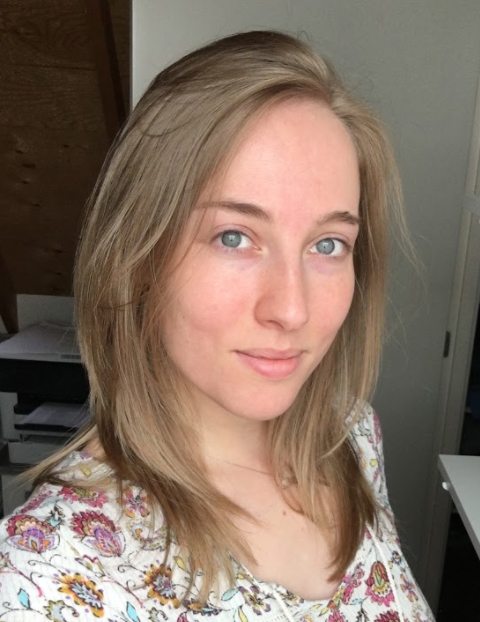
1. Pick a suitable photo of yourself: In the picture below the background is a bit messy, but the light on my face is good. No make-up photo’s usually are better to work with!

self

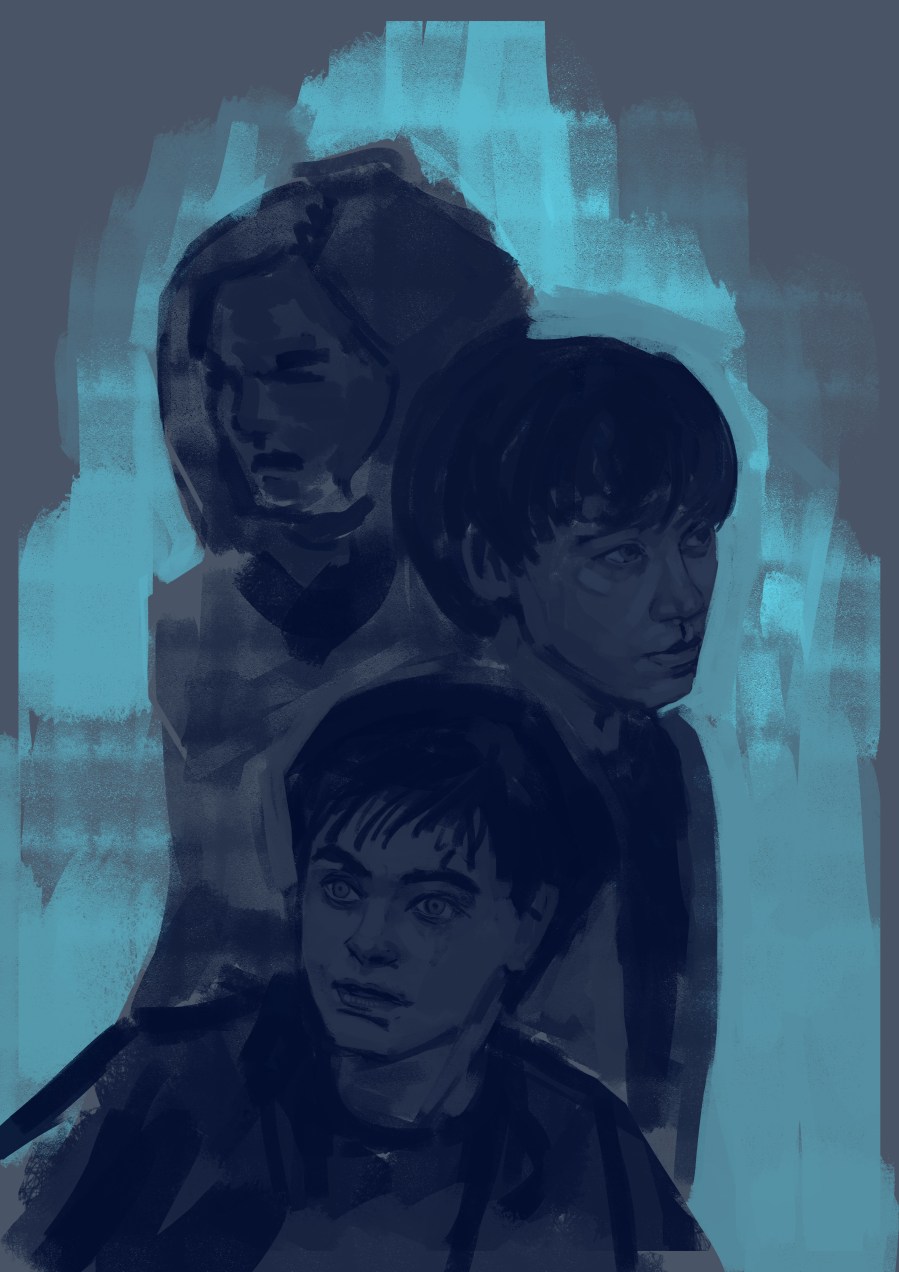
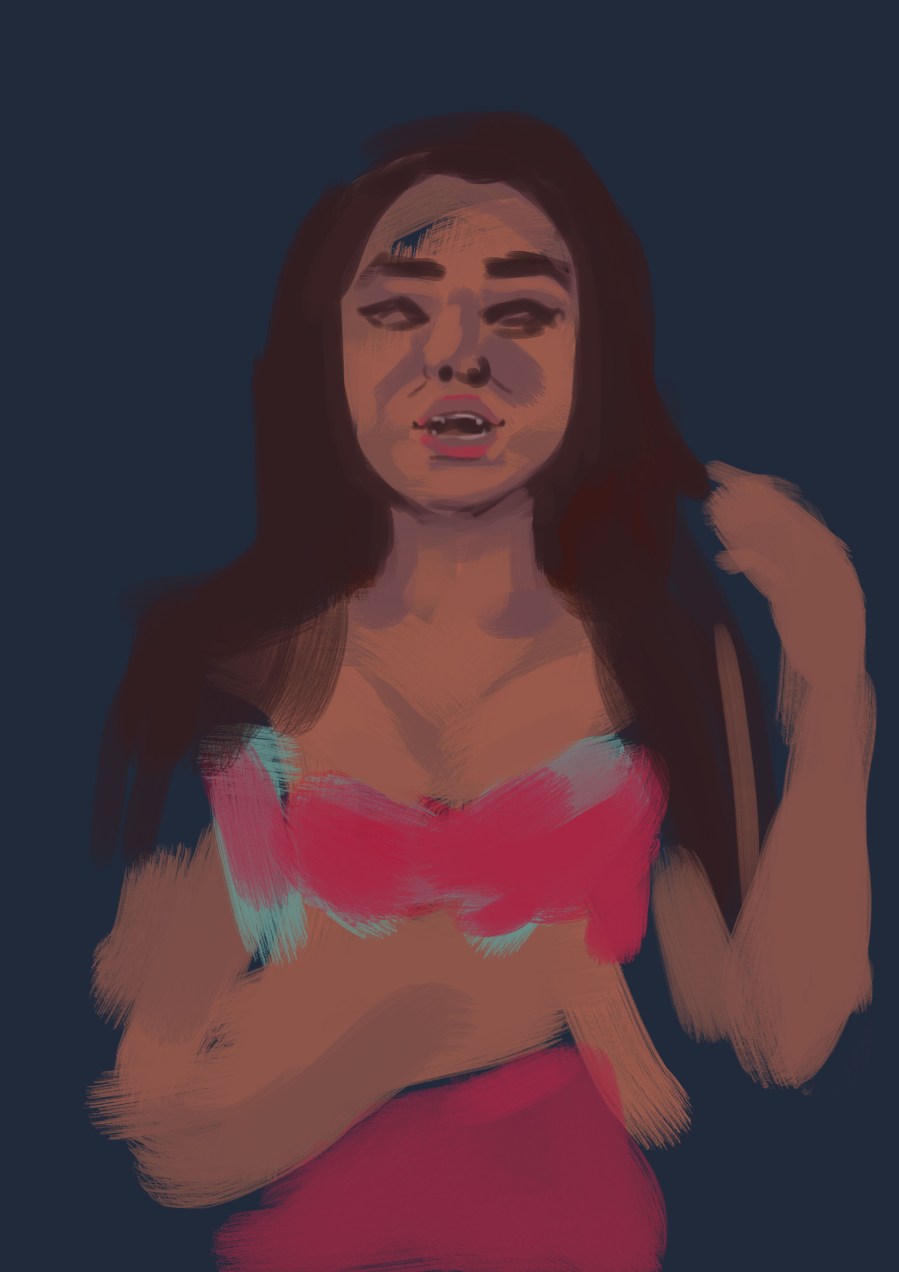
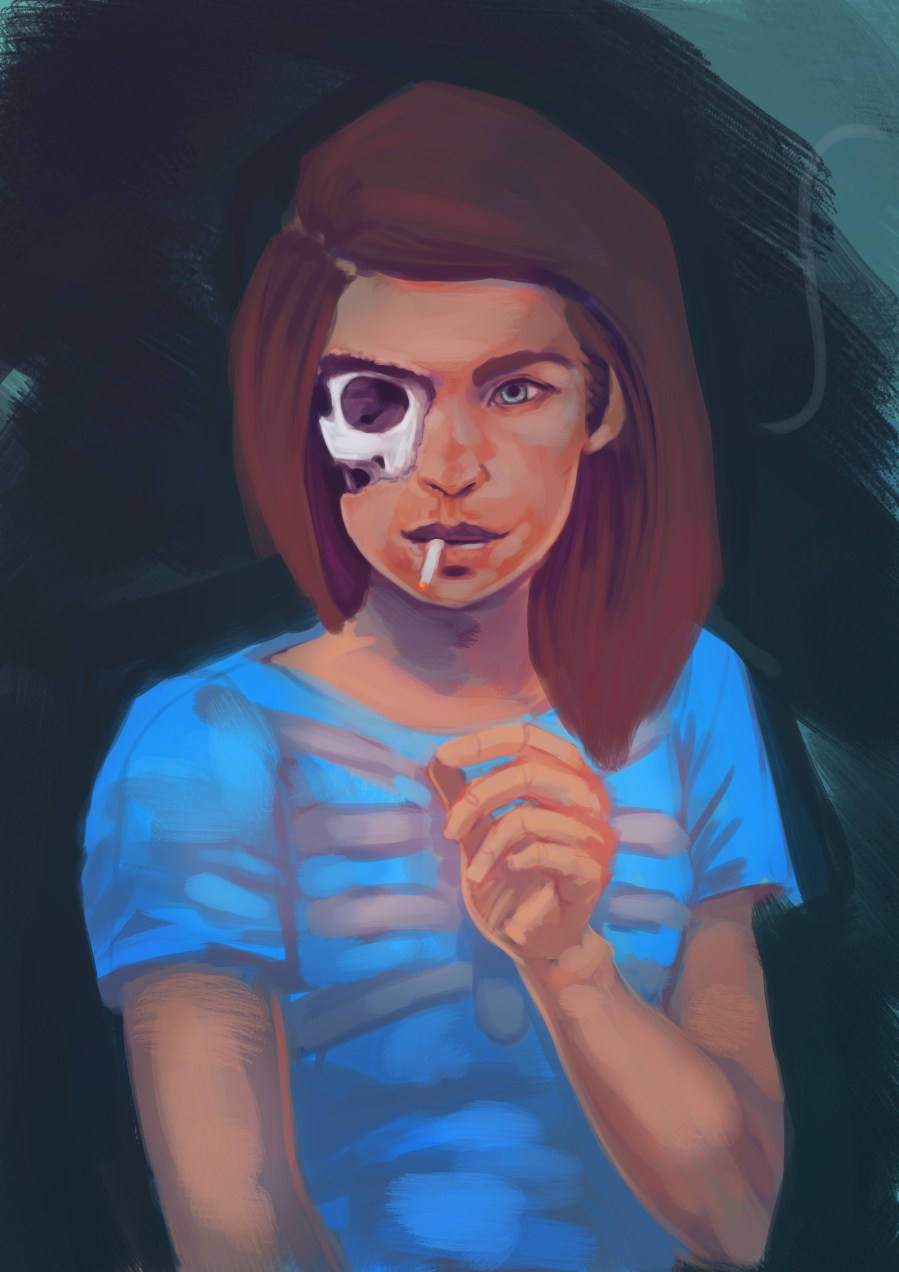
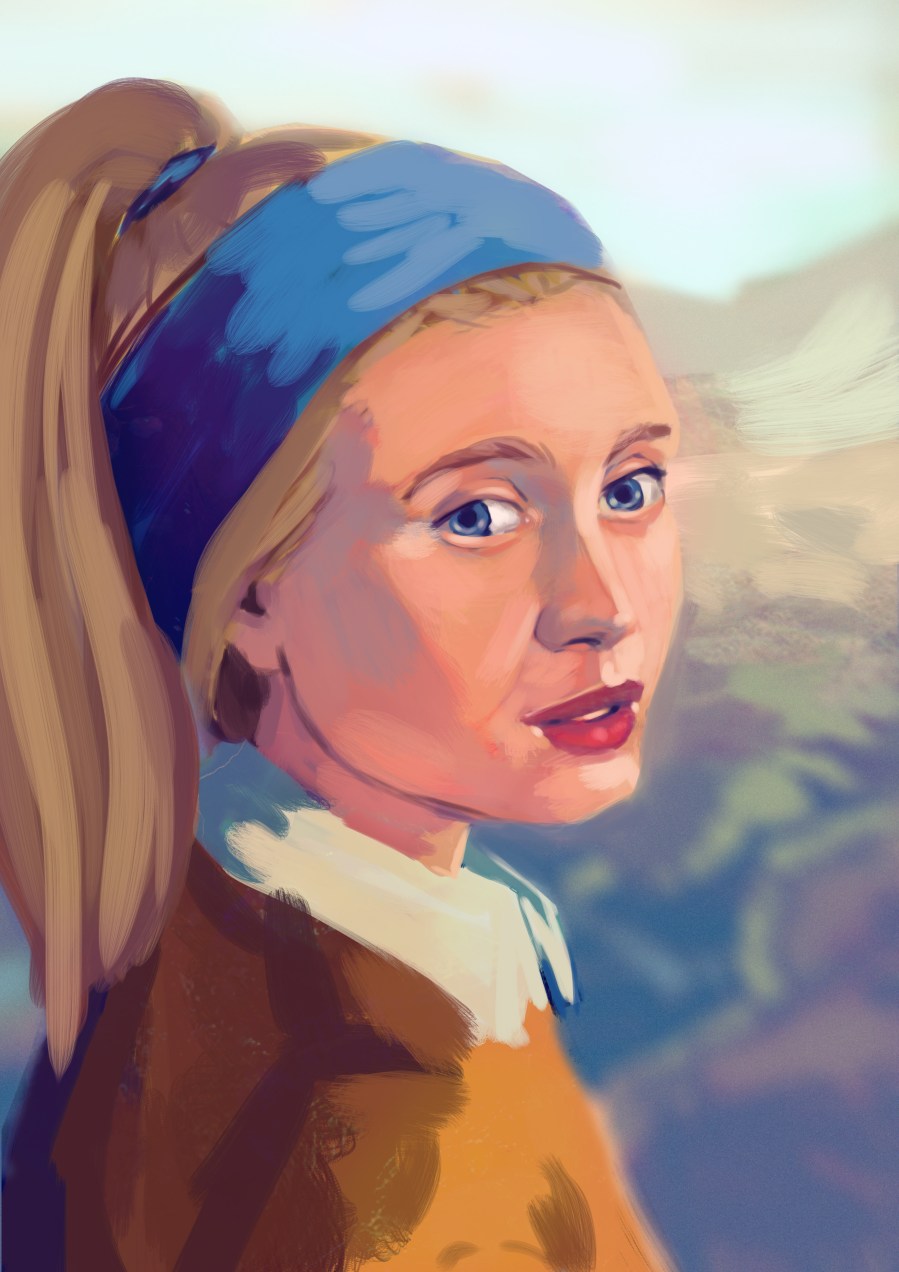
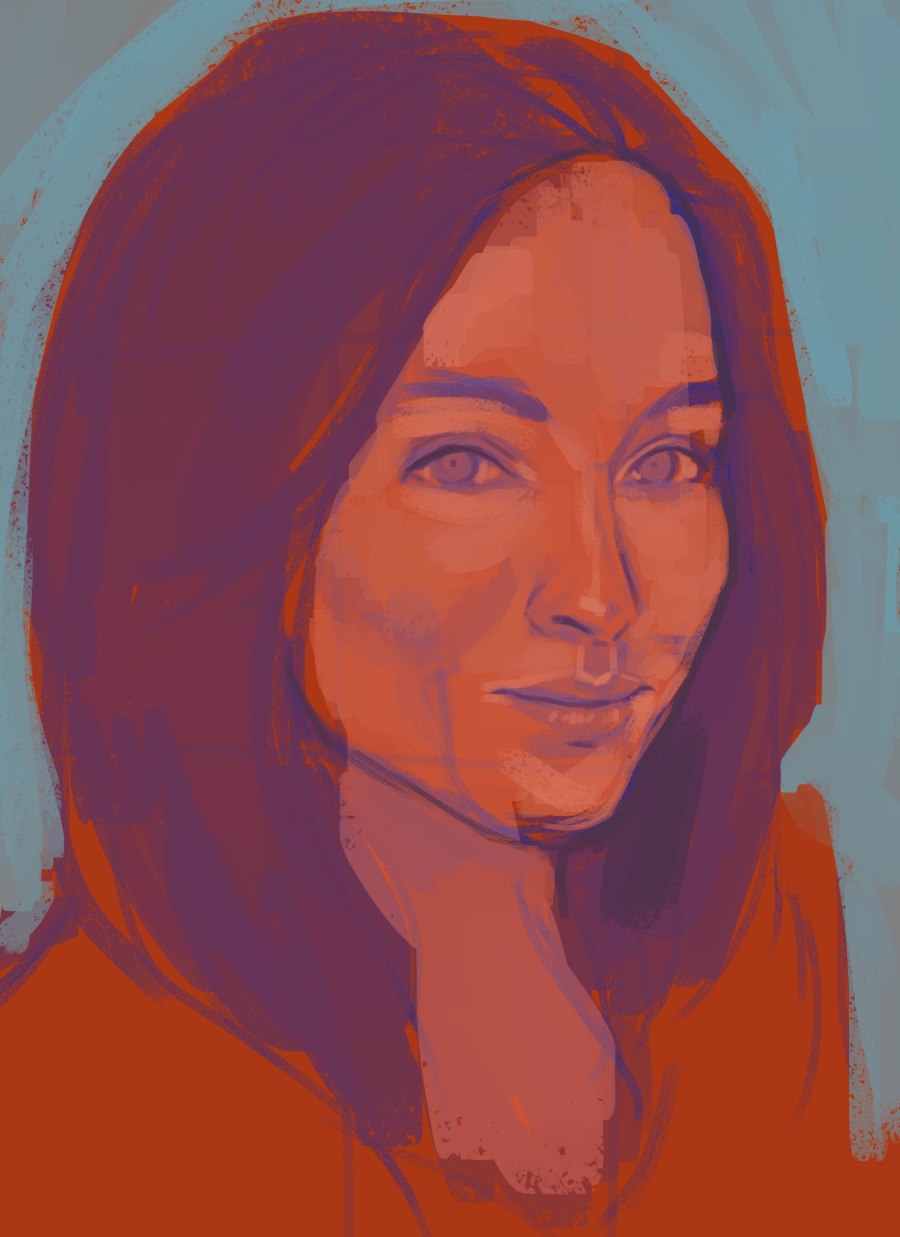
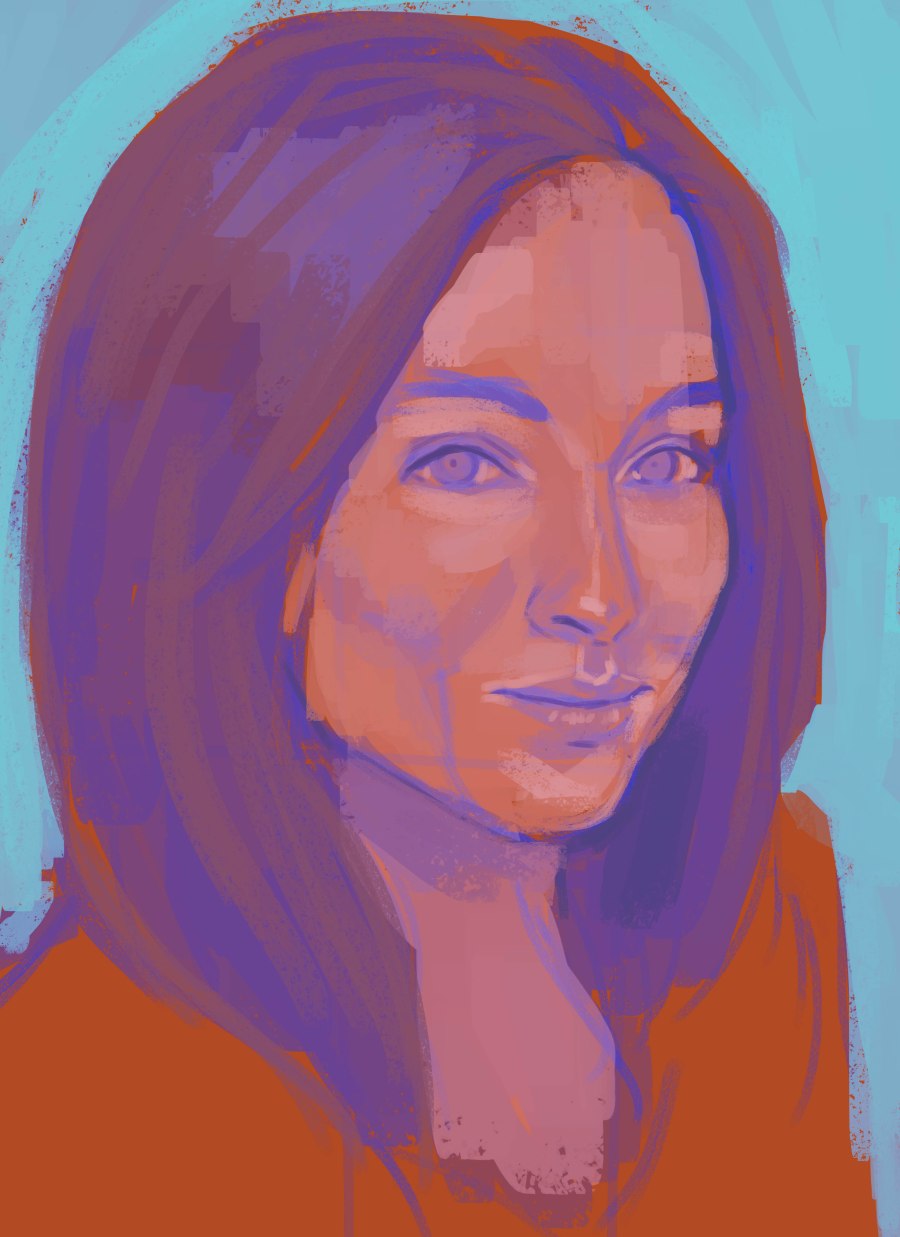
2. Start with your base ( base background and raster; check this photo reference tutorial to see how : Reference tutorial) and set up your basic facial features. I started with an orange base to ensure a warm skin tones. Then I chose a complementary blue as background colour.

1

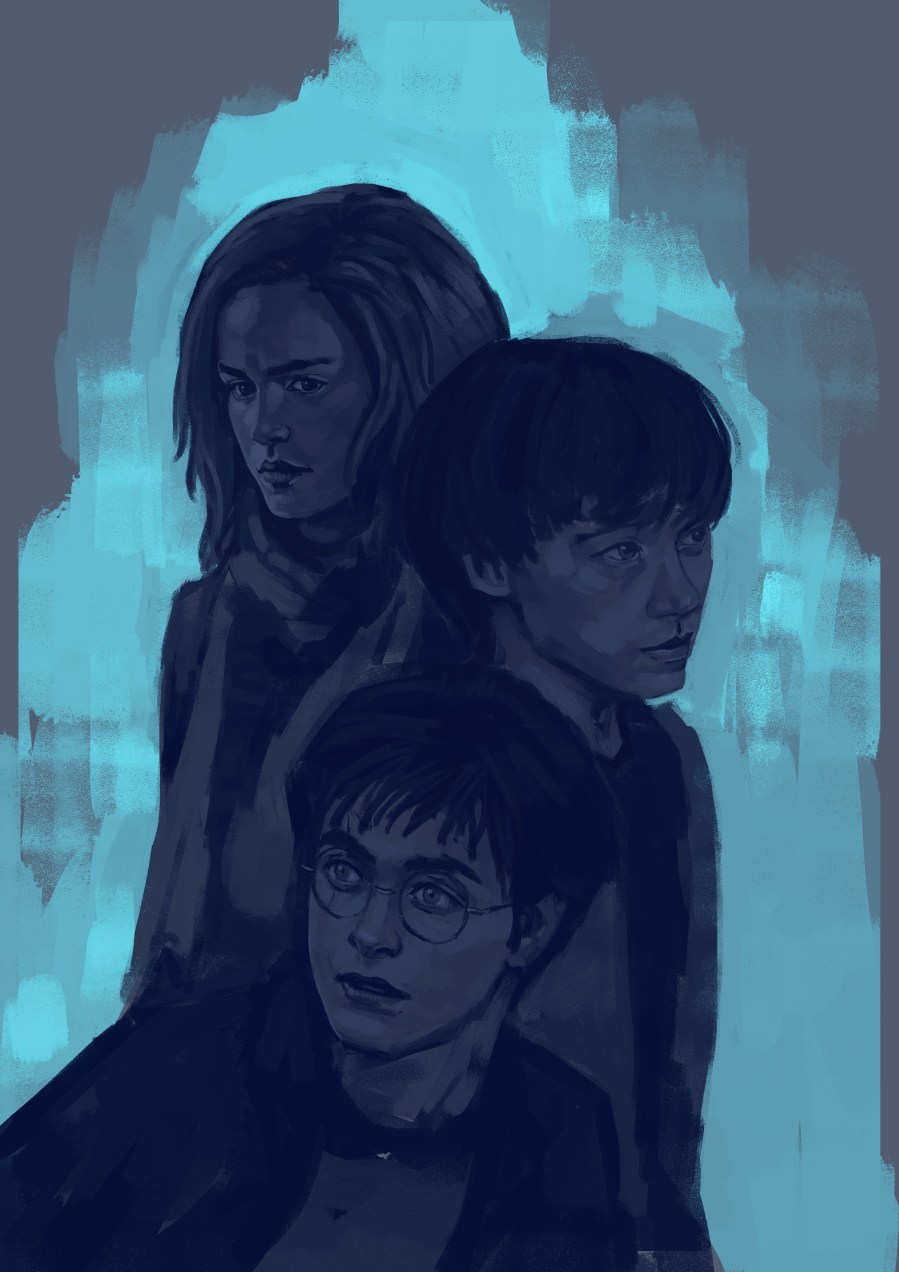
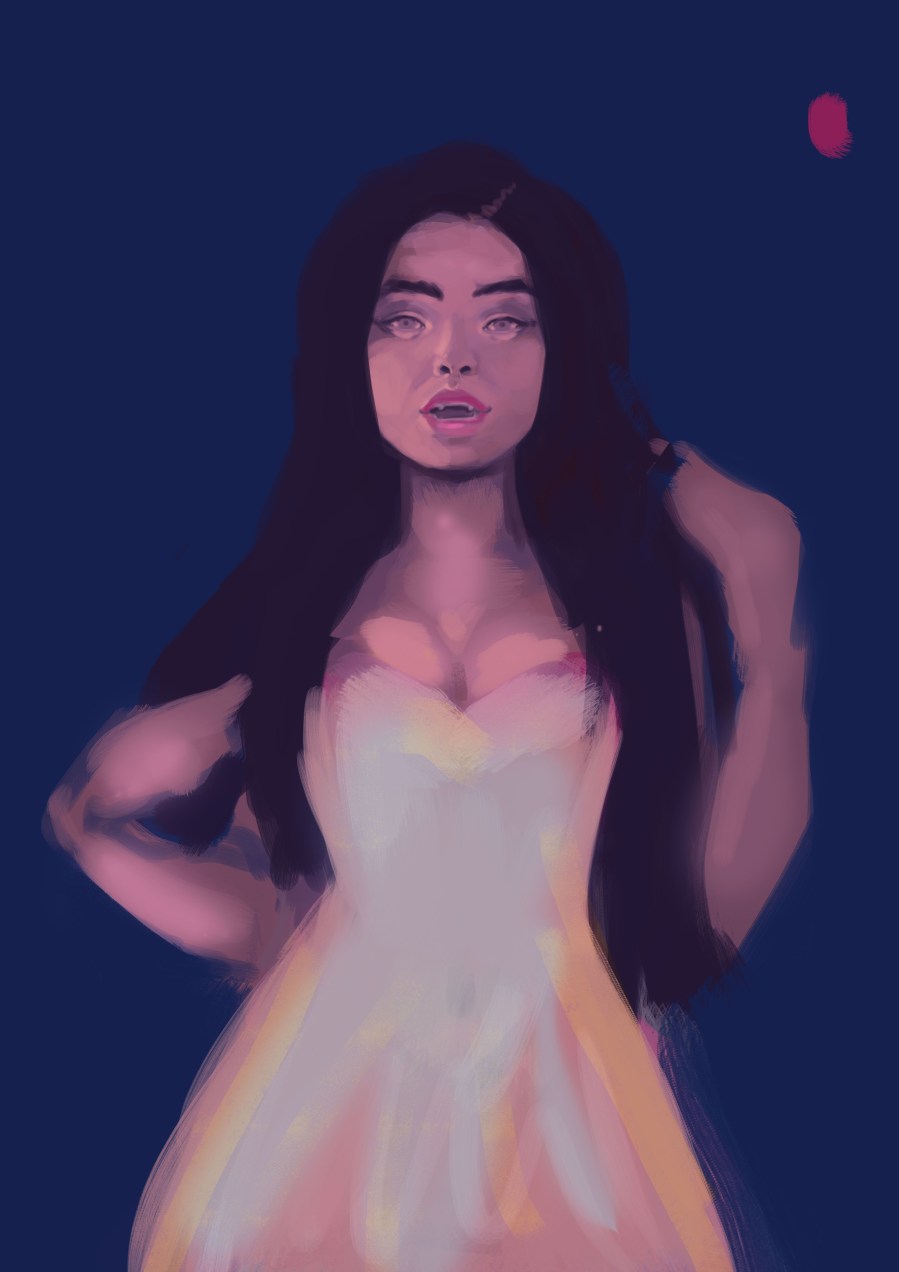
3. Next I brightened the colours more and added some highlights. As you can see, the base colour of the hair is a purple hue, which would seem odd at first. But is really works as a base colour!

2

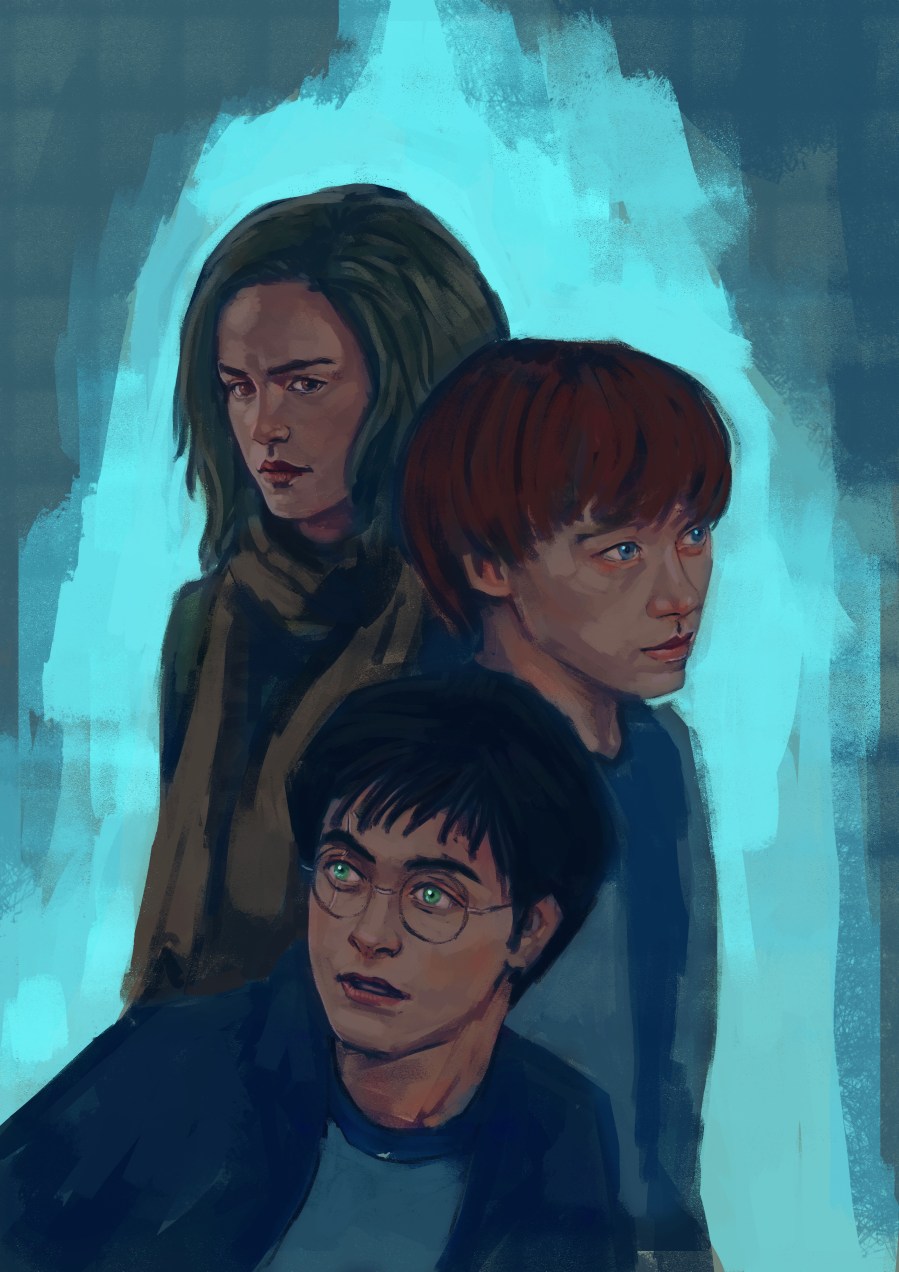
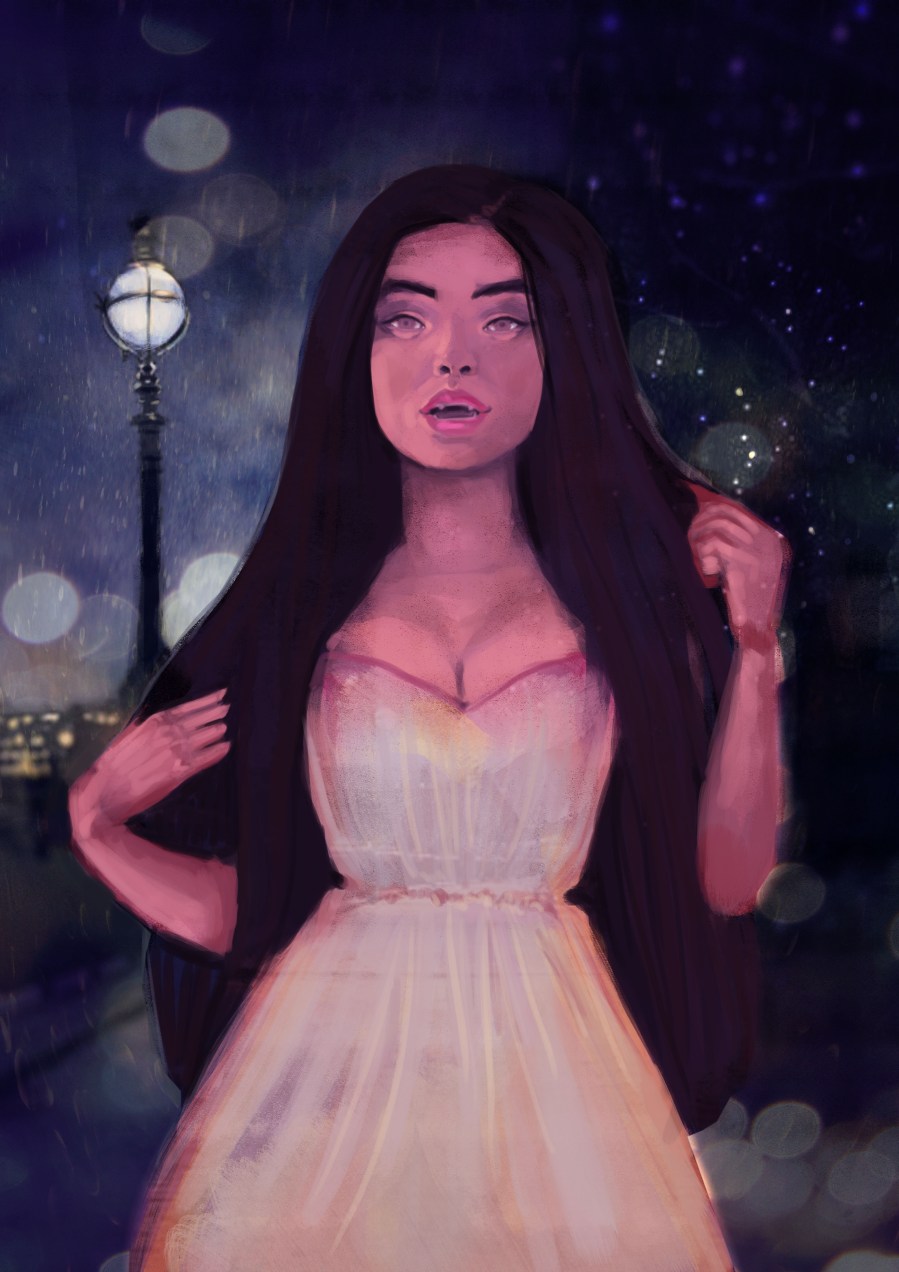
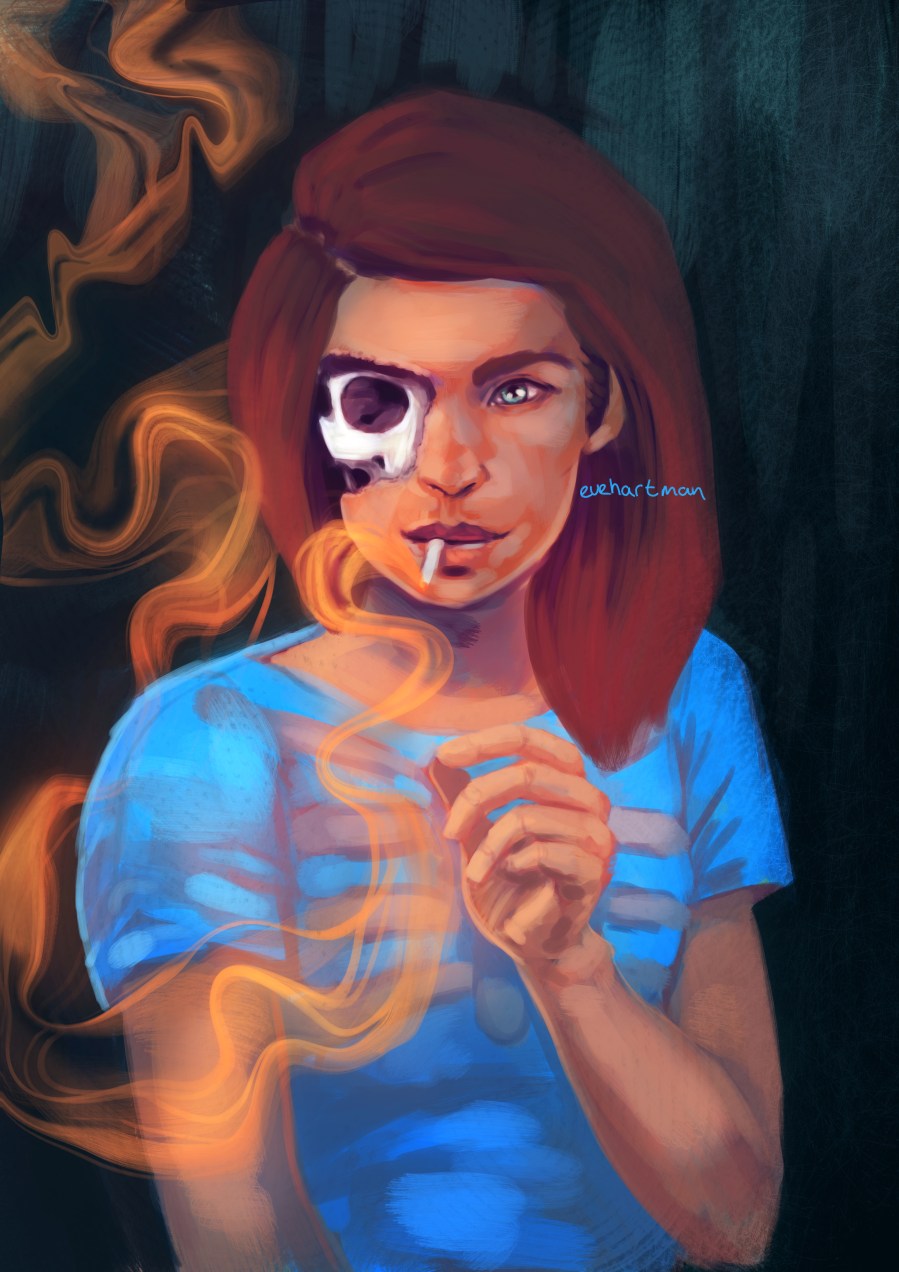
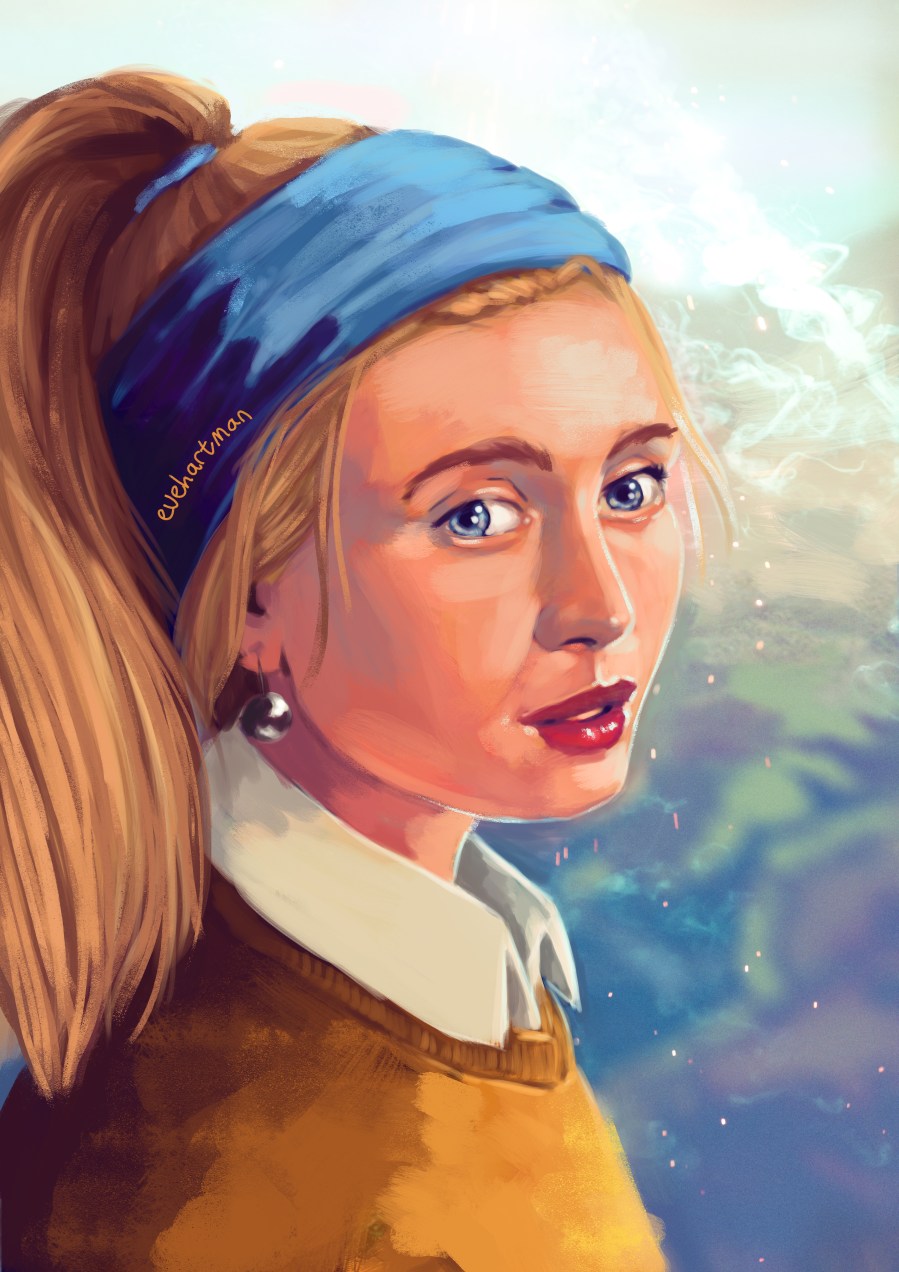
4. Time to define the colours! Below you can see the hair evolving from a purple colour to a blonde shade by applying lighter red/brown colours on top of the base. I also smoothed the skintones and gave the dress another colour (which worked better with the background)

3

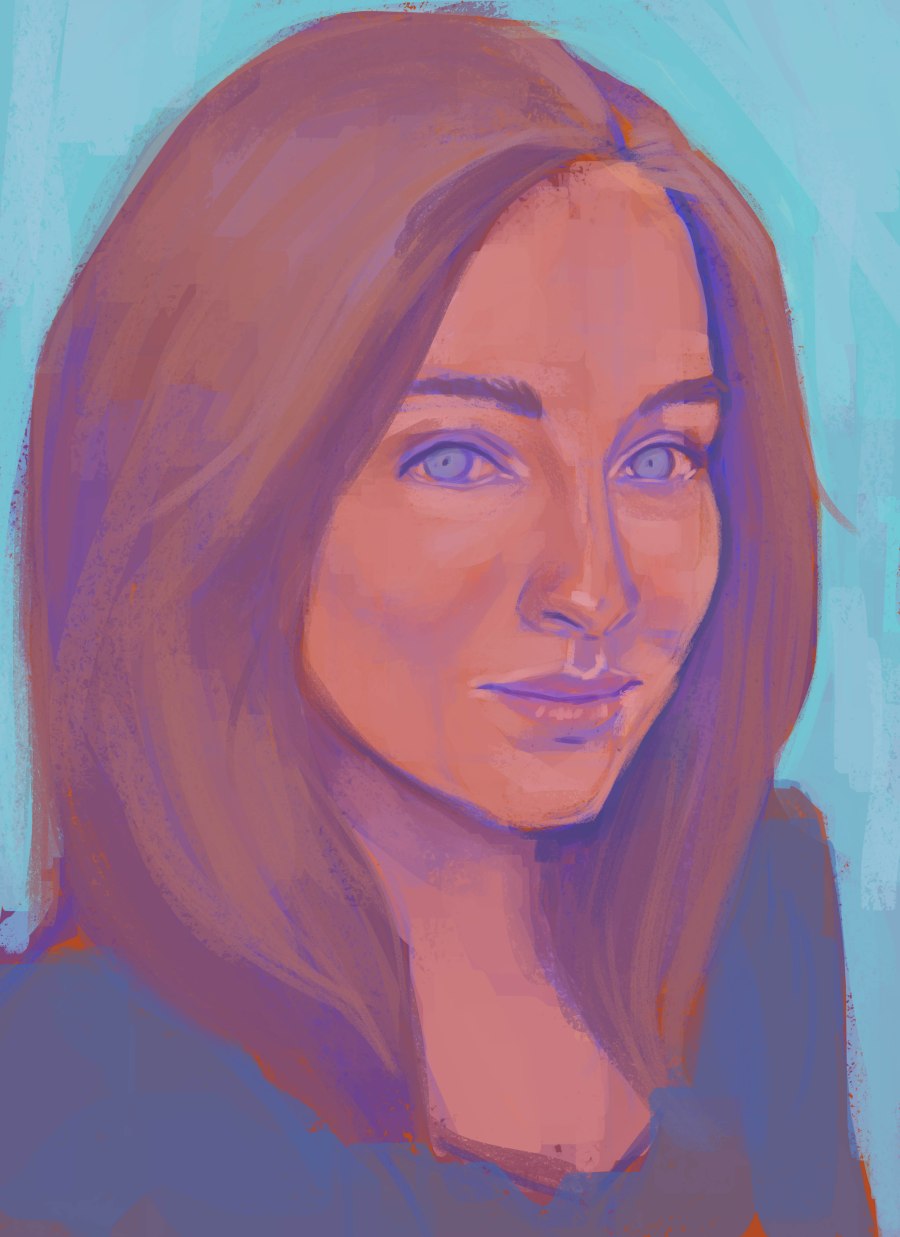
5. It is color dodge time! The previous image lacked brightness and contrast. which I added in this step. Also, I added more colour dynamics by color dodging (to see how you can color dodge, click here: Color Dodge )

5

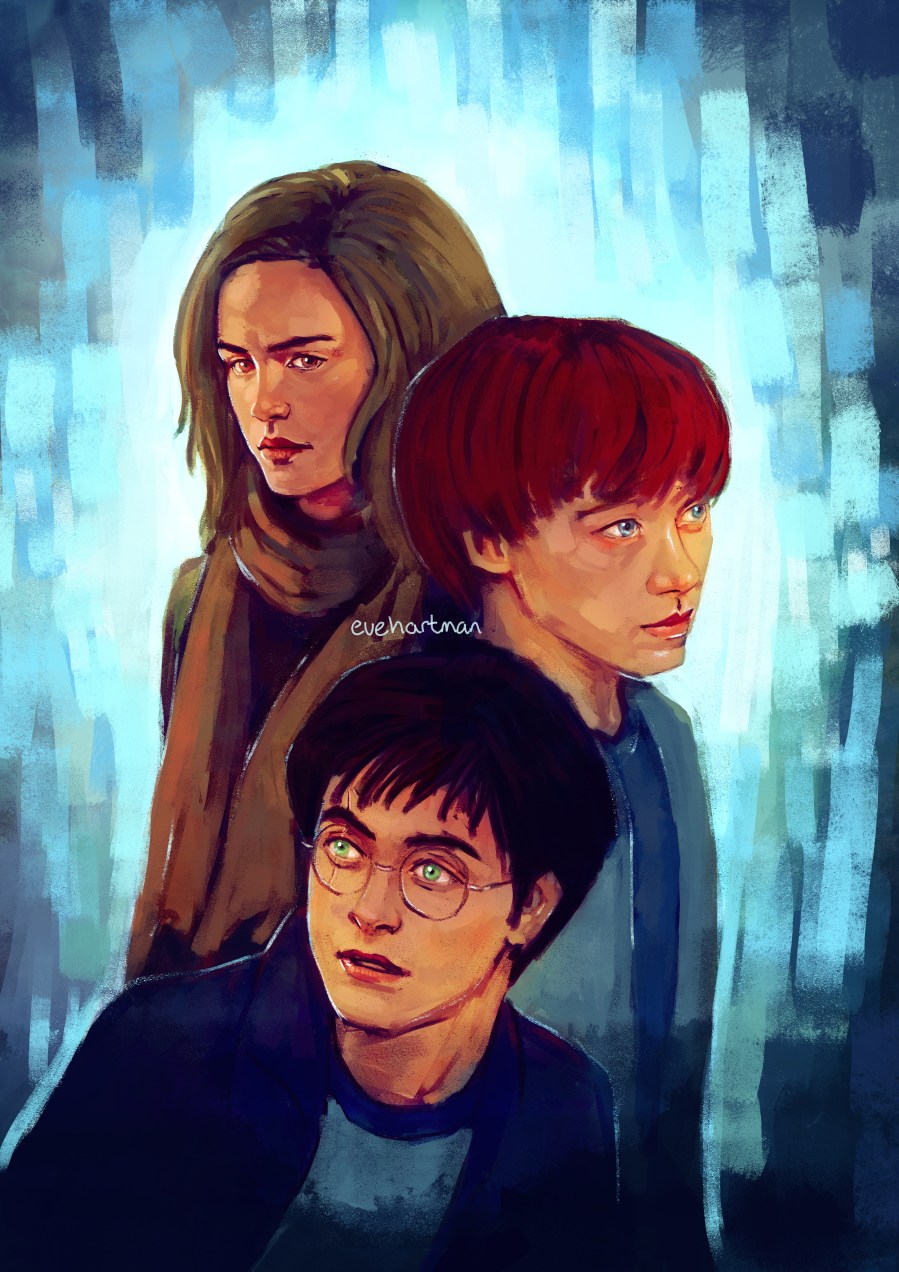
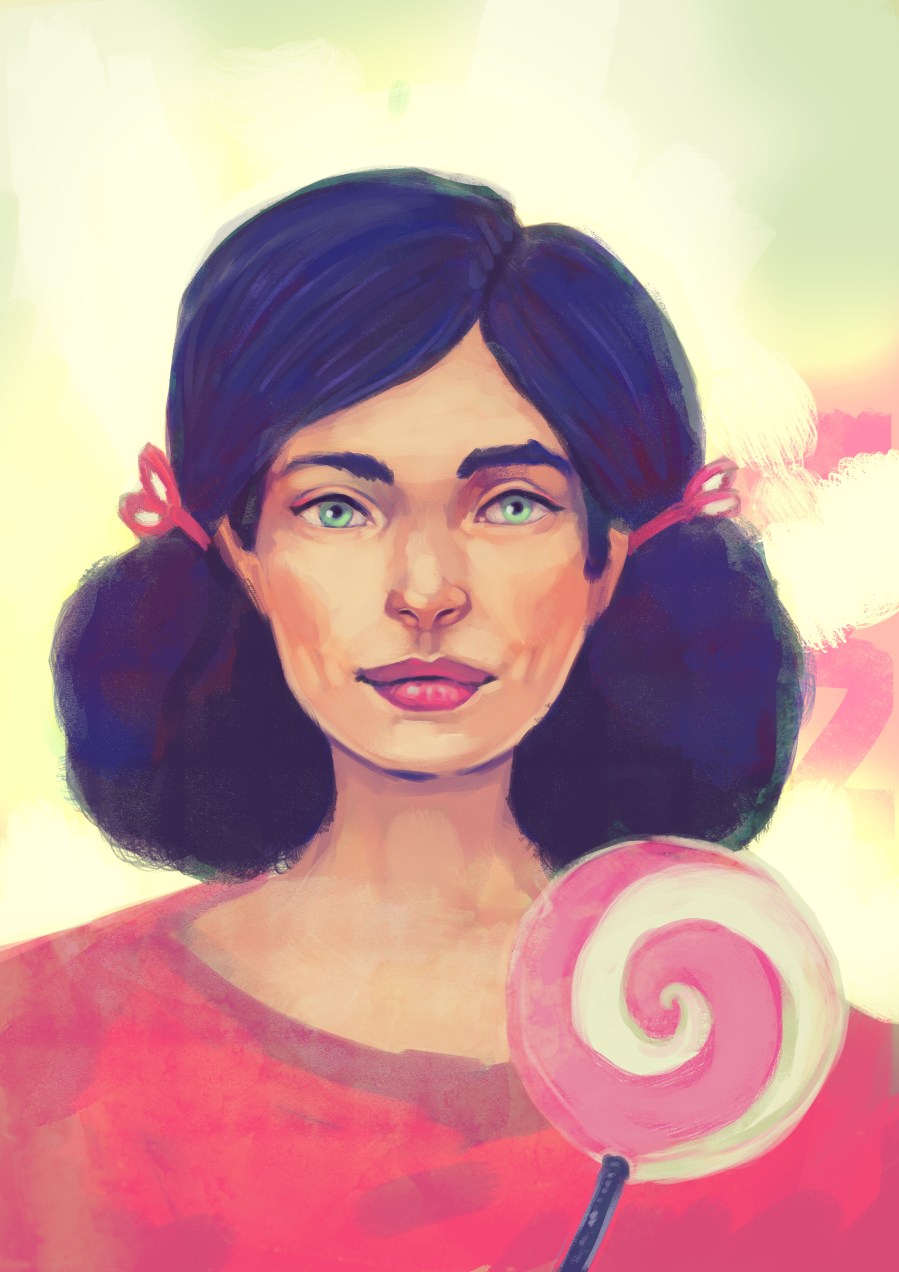
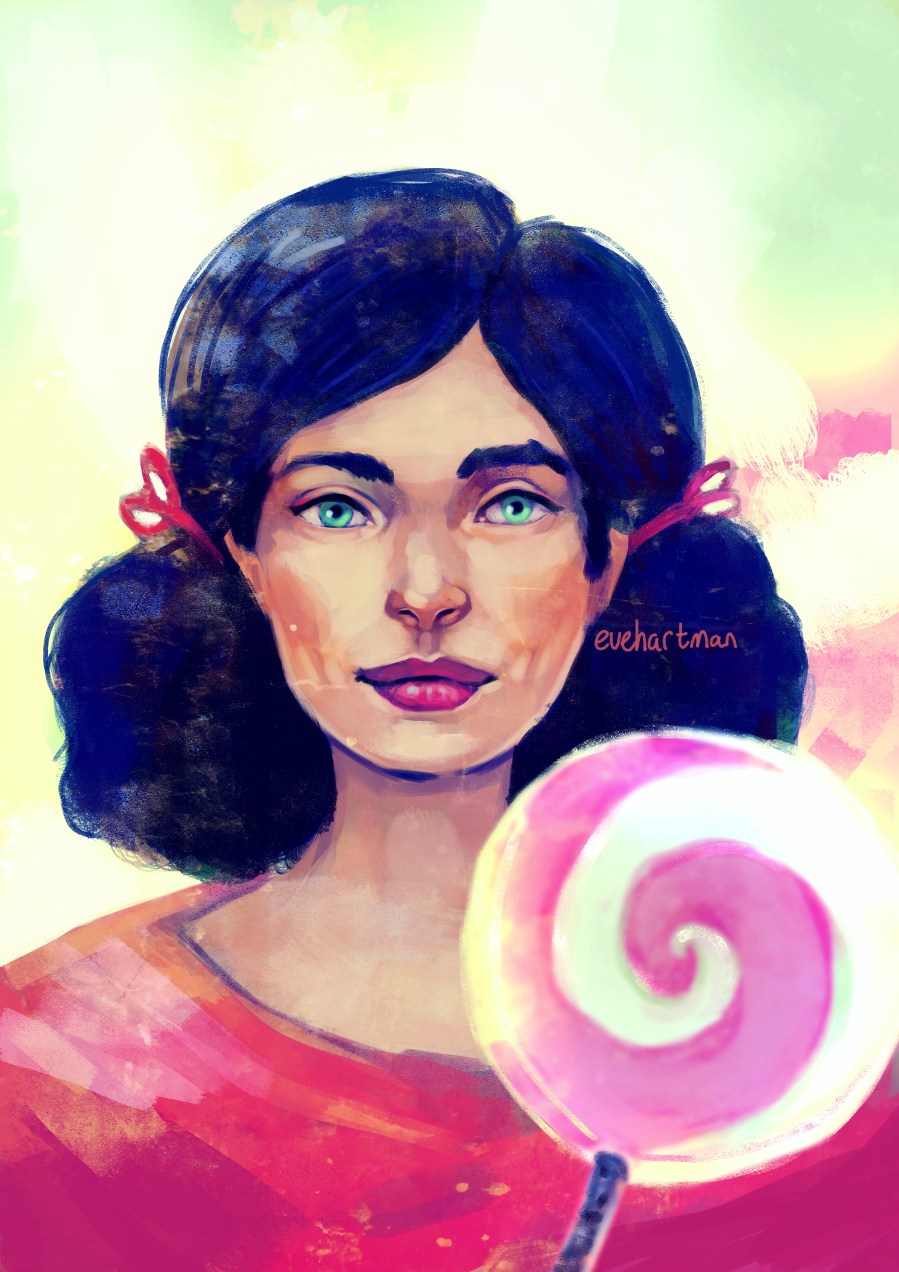
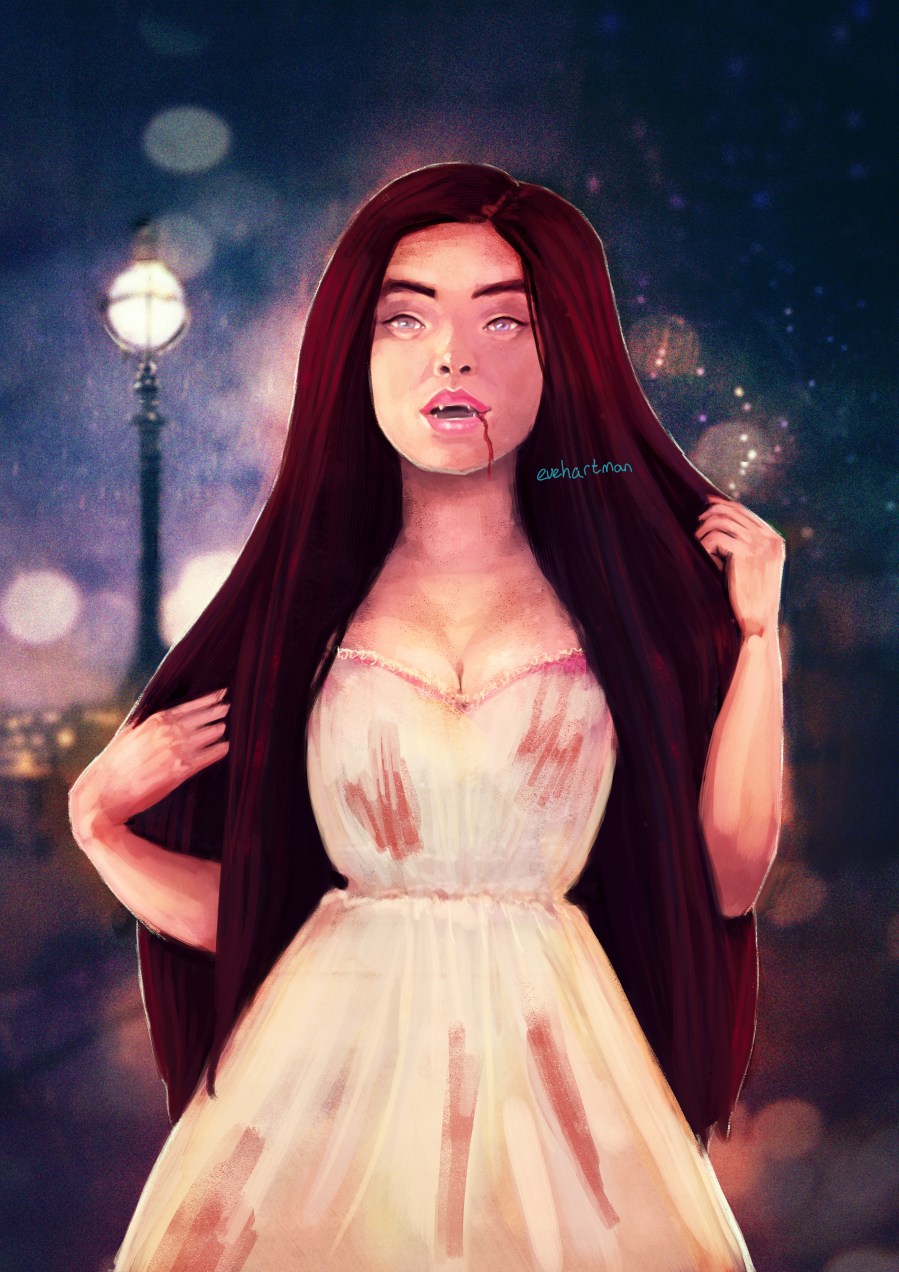
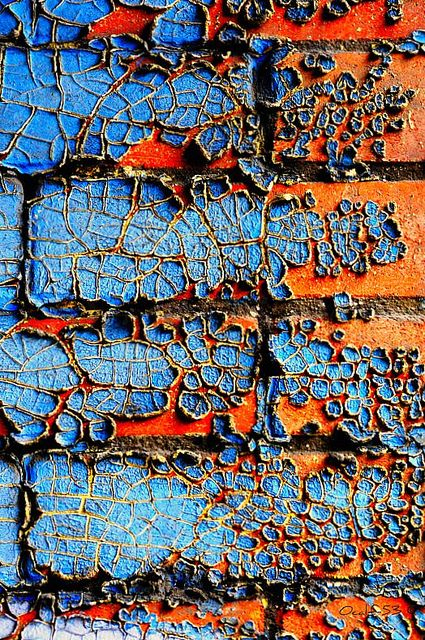
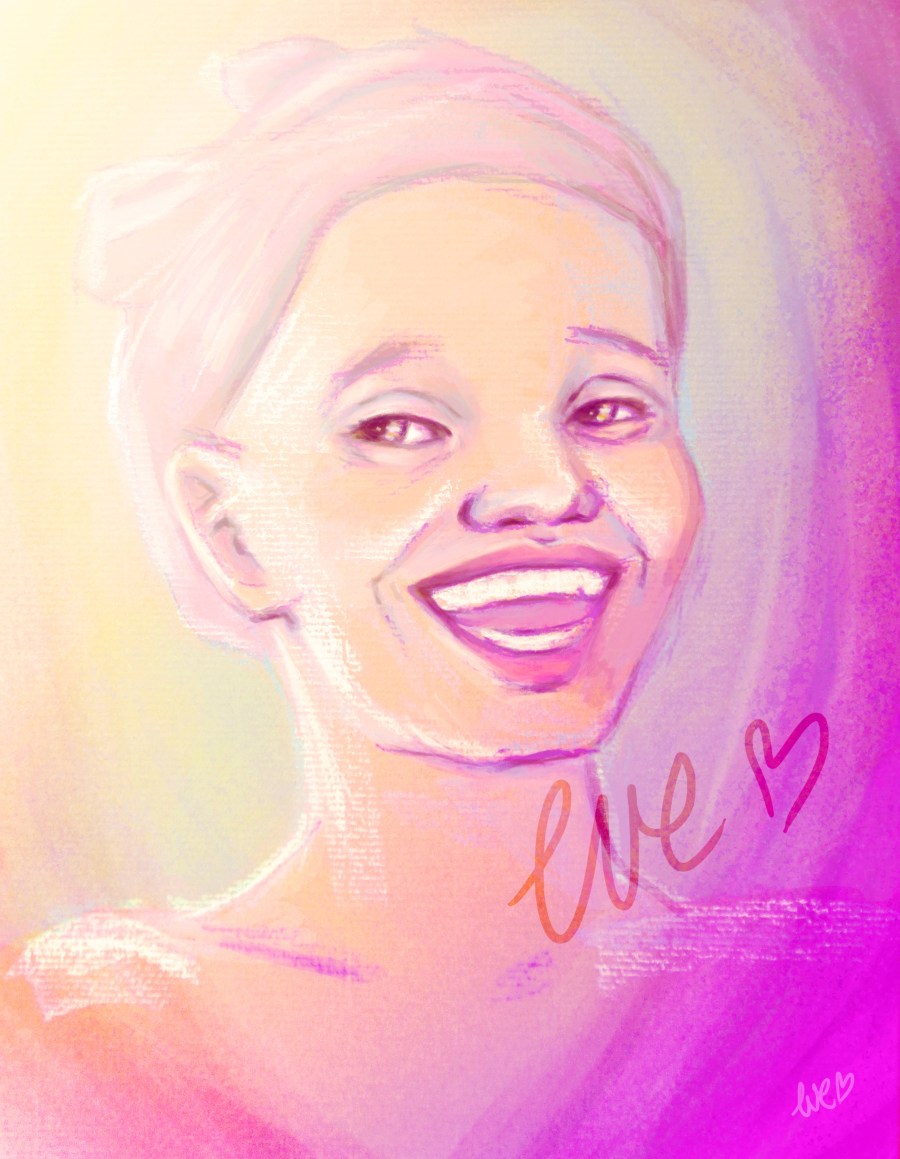
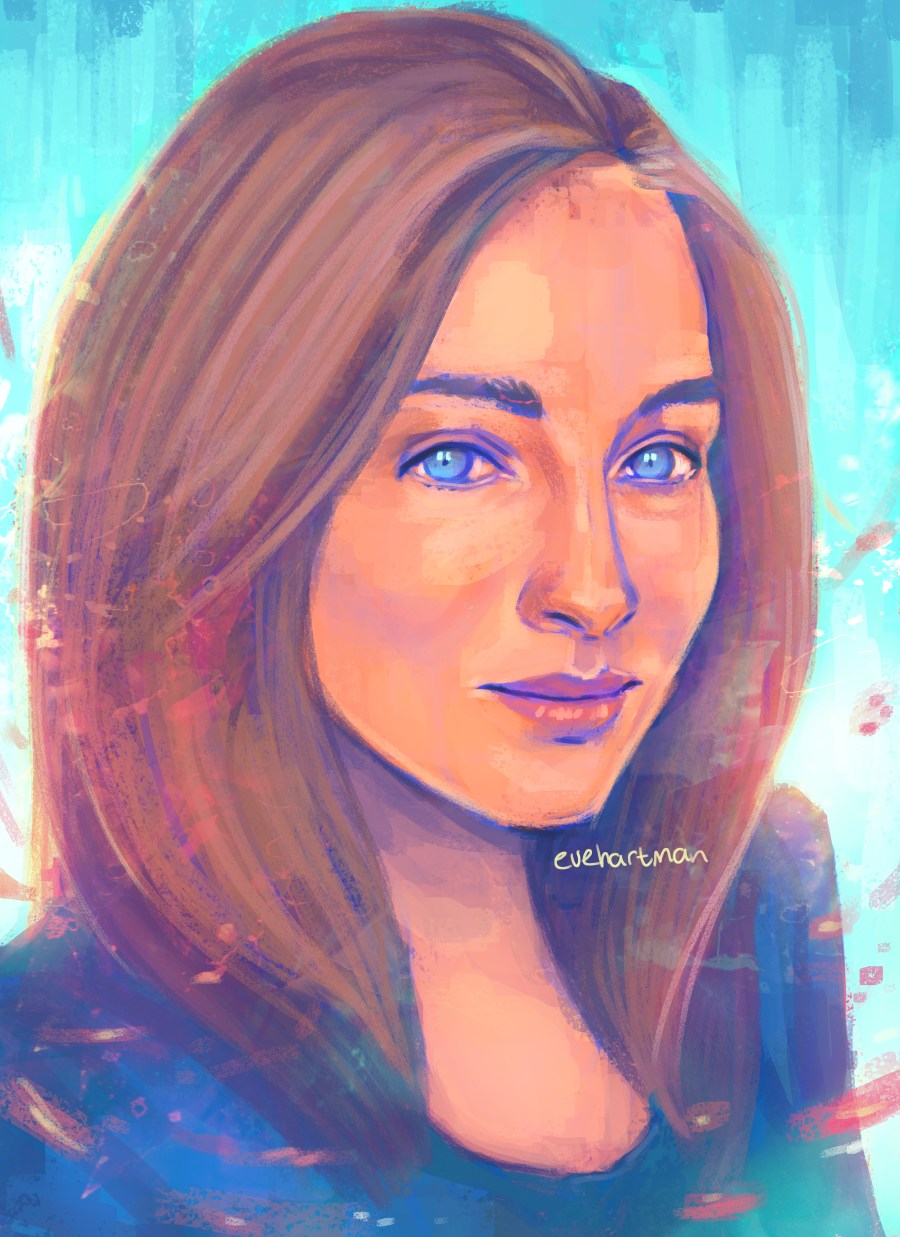
6. Next step is adding textures for colour dynamics. I was able to add a popping pink colour.  (To see how I apply textures, click here: Texture tutorial )6

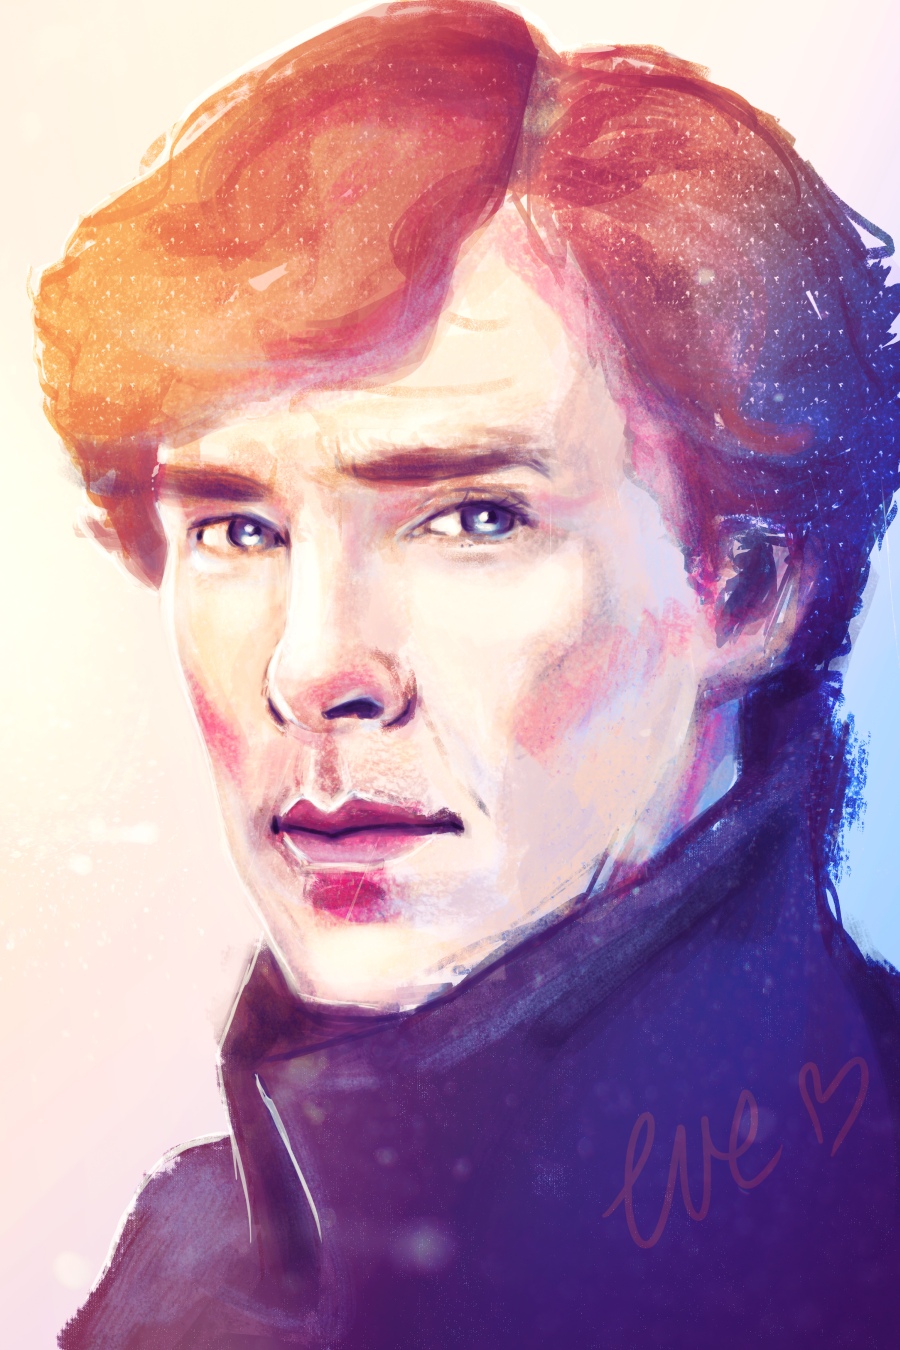
7.  And add finishing touches to complete your portrait!

me

Hope you guys find this helpfull! I would recommend you check out the following tutorials as well to get a better sense of my drawing process:

Original & Composition – Study Tutorial – Base tutorial – Reference tutorial

Love, Eve

New Artwork coming

Sherlock Holmes

I recently bought an anual Adobe license, which provides a variety of programmmes for painting/editing. This portrait of Benedict Cumberbatch as Sherlock Holmes is one of the first drawings made in Photoshop CC (I worked with Photoshop CS4 before CC). Although roughly the same, I noticed that the CC version is easier in use. And my Wacom tablet somehow works faster, which is a big pro!

I also started working with Artrage, a digital art programme that actually uses traditional media. It works phenomenal! I will soon post a review, or perhaps a review video, about this programme.

New artprogrammes mean more art, so be sure to check my site regularly, as I will update new art soon!

Love, Eve

Smile – Charity

I am proud to present you the finished artwork for the charity auction. Smile! There are more details added to her face and changes were made in the colourpalette, but the original background structure was preserved. It was so much fun to paint and I really love this portrait.

SAMSUNG CSC

The event, a gala, took place in a beautiful hotel and I had a blast. A delicious dinner accompanied the charity auction, which was hosted by the famous Dutch ice skater Erik Hulzebosch. Ha, how awesome is that?!

I was more nervous than I dared to admit at the time. My nerves were severely tested once it became clear that I had to enter the stage as well… Luckily I didn’t trip (high heels aaah) and I believe I gave a proper introduction to the artwork. The portrait (with many thanks to mr. Hulzebosch who did a splendid job as an auction host) got a new owner in no time. Also many thanks to this new owner, this means the world to me!

All the funds that were raised, will be donated to a program in a medical clinic in West-Africa.

I am very grateful that I got the oppurtunity to help this charity by donating an artwork. Would do it again in a heartbeat.

Love, Eve