Hello sweeties 🙂
This step by step tutorial will show you my approach on drawing portraits from (photo) references. I hope this will help you with your art!
Reference photo’s I usually find on Pinterest (including this photo). 
Set up your reference photo side by side to your blank drawing document. This document is 3000 x 4200 pixels with 300 DPI (to ensure high image quality)
1. Create a white layer on top of your reference picture and set it to 50 % opacity; this allows you to see the basic shapes of the photo. 
2. Draw, with a dark colour, these basic shapes on top of the white layer. This makes it very easy to copy the shapes onto your drawing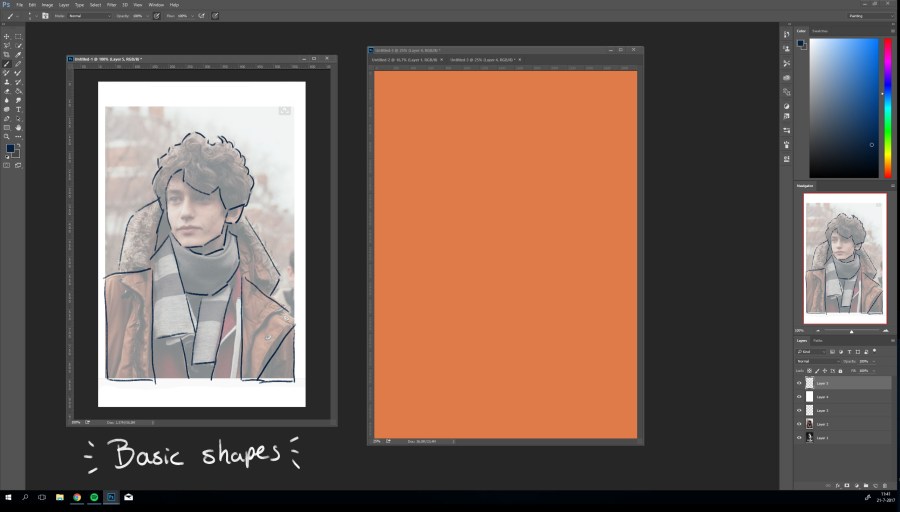
3. Start with a basic raster and start drawing the found shapes onto your canvas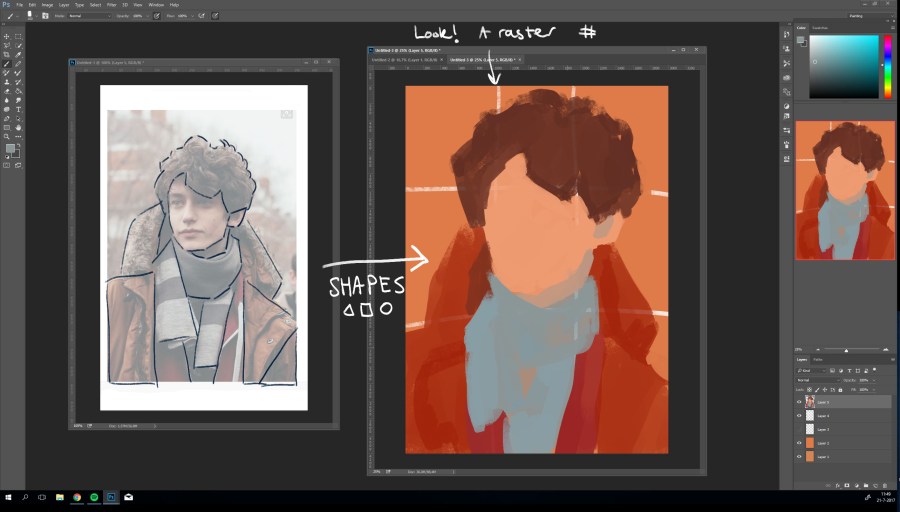
4. Look and see if you can find the smaller, more detailed shapes (usually the facial features) in the reference picture and draw these in both reference and your canvas 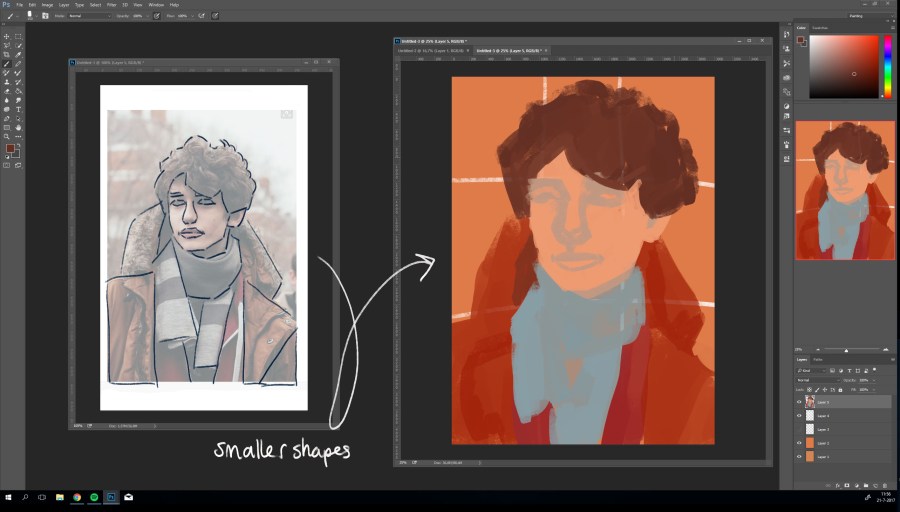
5. Flip it! Horizontally flip both images to check for any asymmetry and irregularities. Adjust them if necessary.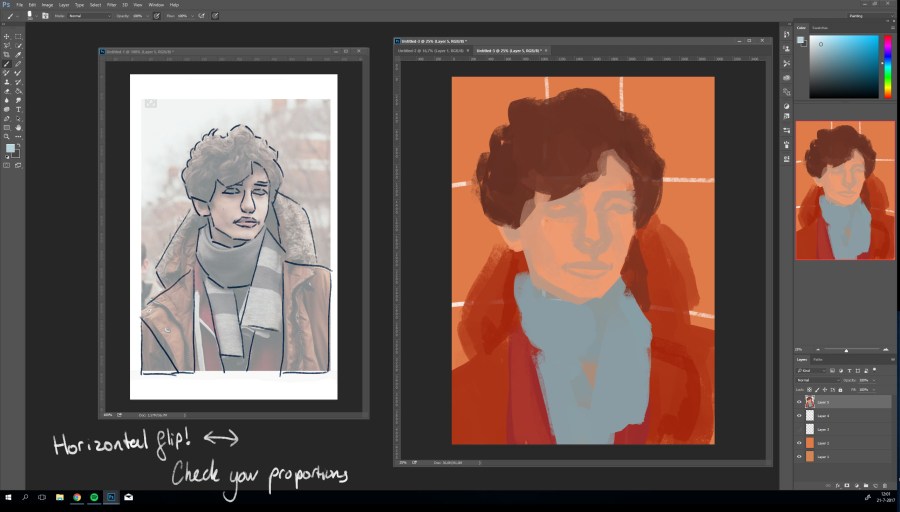
6. Flip the image back and start working on your colours and background. As you see here, I went with the contrasting colours red and blue. 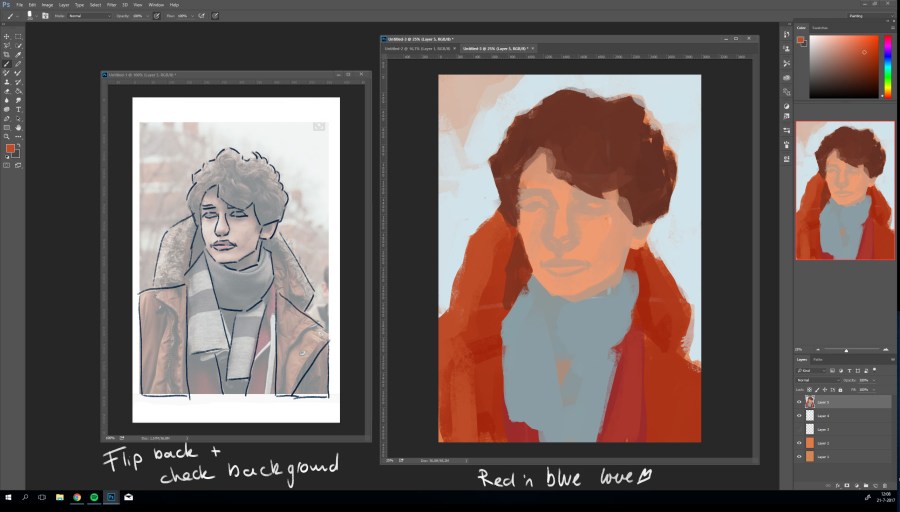
7. This is the moment you remove the white and lines layer from the reference picture and start defining the shapes and shadows. 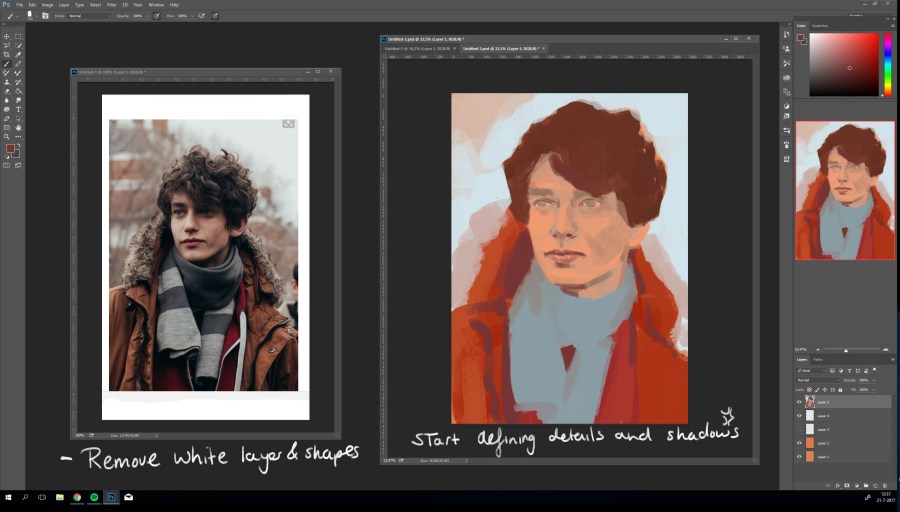
8. Also pay attention to your colours! I always use my colour picker ; this will ensure you keep a balanced and cohesive colour palette. 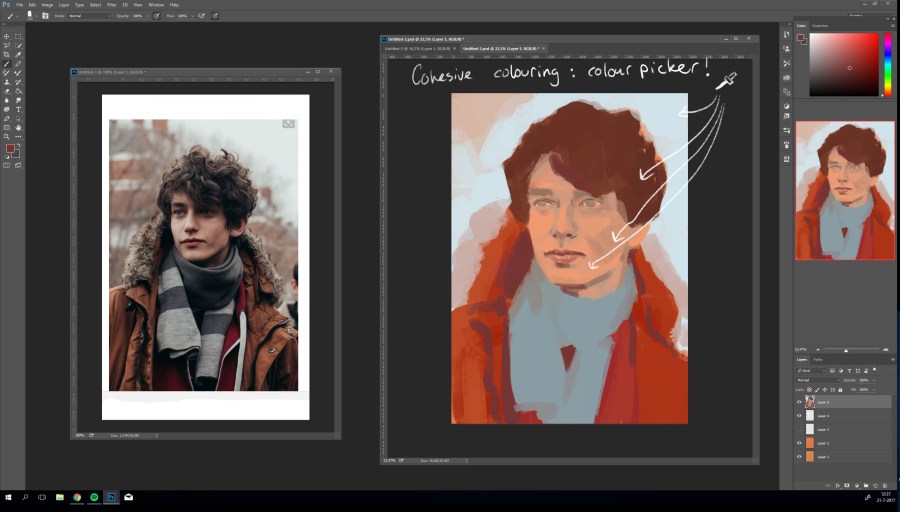
9. You just have to keep on drawing; every once in a while, take a pause (drink something, do a little dance, whatever) and take a new and refreshed look at your painting: adjust the things that, at first glance, seem out of place . 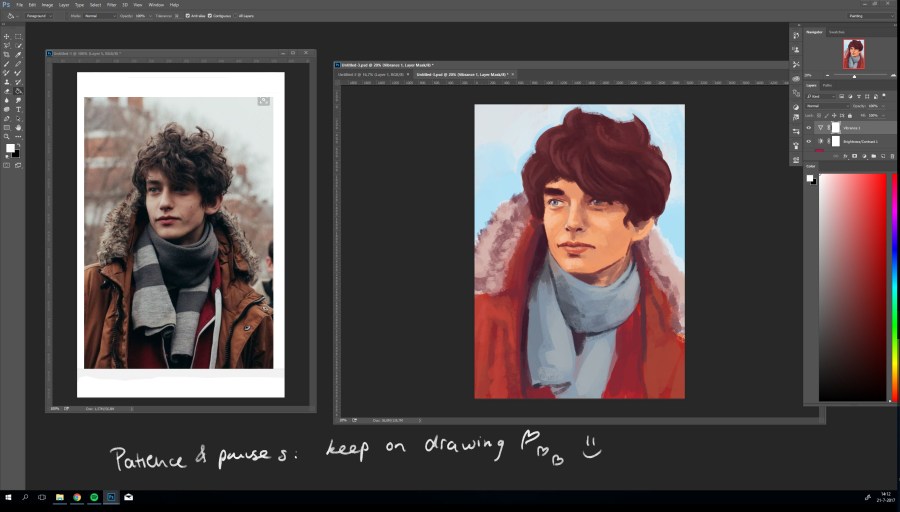
10. When I am almost finished, I usually add some textures, change the lights a bit, adjust some colours and voilà! Portrait is done!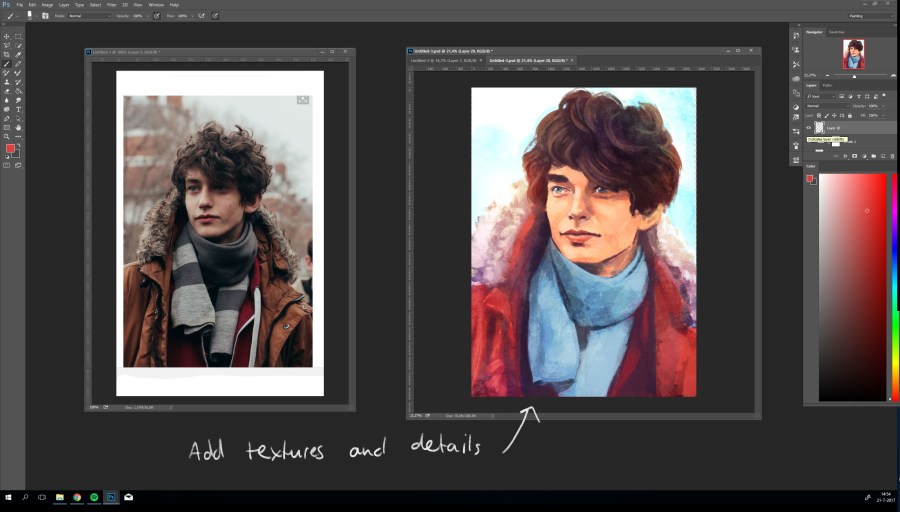

And your done! If you have any remaining questions, you can always comment them below 🙂
Have a lovely day!
Love, Eve

One thought on “Reference tutorial”